Pages

Saturday, March 30, 2013

Your Home Screen - Your Photo!

Tired of the same old Apple wallpaper on your iPad or iPhone? It's easy to use a photo of your choice instead! Here are EZ step-by-step instructions to switch your home screen or lock screen image.


Switch from one of the standard wallpapers to...

... a photo of your choice! (Here a picture of Embarcadero Center, on the San Francisco waterfront)


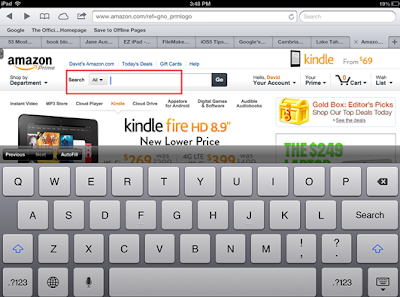
Tap your Settings icon to start things off.


Select Brightness and Wallpaper


The two images you see (highlighted in red) are your current wallpaper settings. On the left is the "lock screen" image. On the right is your "home screen" image.


Tap the little arrow on the right (highlighted in red) to continue to see your wallpaper choices


"Wallpaper" and "Photo Library" are default images Apple provides. But as you can see, all of your photos on your iPad, iPhone or iPod Touch can also be used!


 I'm going to choose a picture from my Camera Roll, so I tap that.


You'll then see the images from your iPad's Camera Roll album. I'm going to tap on the picture highlighted in red as my home screen image.


For iPhone or iPod Touch users only, you then see this screen next with your chosen image and the option to Cancel or Set. Choose Set to continue.


Next, in the upper right you see choices to set your image as the Lock Screen, Home Screen or both. You can also Cancel in the upper left if you are having second thoughts on your image choice! I'll choose Set Both.


You have now changed your wallpaper! Confusingly, however, you have been dumped back to this screen of your photos. Tap your Home Button (highlighted in red) to go to your Home Screen and see your new image.


Your iPad Home Screen with its new look!


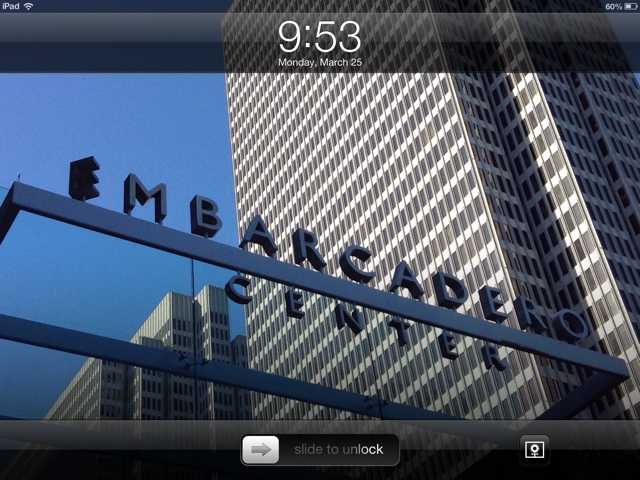
 And your Lock Screen has been changed as well

Sunday, March 24, 2013

Showing the Keyboard


"How do I get the keyboard to appear?" is a question faced by every new iPad user.  At first glance, the keyboard seems to have a mind of its own, appearing and disappearing like a capricious spirit.  But actually it's quite easy to get the keyboard to show (or hide) anytime you want. 

To make the iPad keyboard appear, simply tap in any input field. The keyboard will pop-up, ready for typing.

Some examples will illustrate.

Example 1 - Google. 
We'd like to search, but how do we type in what to search for - there's no keyboard!


Solution: tap in the search box, highlighted in red here. Make sure you see the flashing vertical line, or "cursor" in the box (if you didn't, try again, the iPad didn't recognize your tap). Now you are ready to type.

Example 2 - Amazon. Let's search for new product; but again, there's no keyboard to type in our product name.

 
Solution: we tap in the Amazon search box, see our flashing cursor, and the keyboard appears for us.
 
Example 3 - we are in the Notes app and want to add to our To Do list. Again, no keyboard.


Solution: we tap on one of the lines in the Notes app, and the keyboard pops up.


Example 4 - we are in App Store and want to search for a new app. However, no keyboard.


Solution: we tap in the Search Store box in the upper right, and the keyboard appears.

So that's the trick to making the keyboard appear: just tap in the box where you need to type something and the keyboard will show to do your bidding!

Hiding the iPad Keyboard
 
Now the opposite problem: how do you get the keyboard to go away when you don't want it? Maybe you started something with the keyboard, and have changed your mind, but the keyboard is stubbornly waiting for you to continue typing! How to get rid of it?


Example - you're in the Yelp app, and want to look more closely at the map. But the keyboard is in the way. You need to hide the keyboard.


Solution: on the keyboard, notice the one key in the lower right highlighted in red. It's a keyboard symbol with a down arrow. That's the "Hide Keyboard" key. Tap it to hide the keyboard.

 
After tapping the "Hide Keyboard" key


Solution 2: You can also hide the keyboard by tapping anywhere on the screen that's not part of the keyboard. In this case, tapping the Yelp map made the keyboard disappear.


Summary

  • To display the keyboard, simply tap in the input field where you want to type.
  • To hide the keyboard, tap the Hide Keyboard key, or tap anywhere on the screen outside of the keyboard area.


Sunday, March 17, 2013

Connect to a New WiFi Network

Away from home? Need help to connect to the Internet with your iPad, iPhone or iPod Touch?  These instructions will help you connect to another WiFi network, guiding you step-by-step.
 
You'll need two things:
  • The network name to connect to
  • The network password
Once you have these connection details it is time to get connected!


 1. Tap on Settings


 2. Select WiFi in Settings.  It will show the current network you are connected to (or Not Connected).  On the right, you'll see a list of WiFi Networks. 


 If you are connected, a checkmark will show to the left of that Network. Here I'm connected to the Book Corner-named network.


For iPhone or iPod Touch, the WiFi Setting screens appear like this. The first screen shows the WiFi network you are connected to (if any).  Tap on the WiFi selection (if iPhone/iPod Touch).


 For iPhone/iPod Touch, after tapping on WiFi, you then see this WiFi Network screen. This iPhone or iPod Touch is connected to the BookCorner network.


Now I have moved out of range of my network. Notice to the right of WiFi (upper left) it now says "Not Connected". Also, in the list of networks on the right, no network has a checkmark next to it, indicating none are connected. 

3. Tap on the WiFi Network Name  you want to connect to.  I will tap on the "On the Go MiFi DE58 Secure" Network. This is the network of the place I am visiting that I have been given a password for.


You will see an Enter Password screen after tapping on the WiFi Network Name. Again, no free lunch: you need to know the password to join the network.


4. Enter the password for the Network and select Join.
 
 
It may take a little while to connect, just be patient. Finally, you will return to the WiFi screen, and hopefully see a checkmark next to the network you have joined. This means you now have Internet again!  (if not, reenter your password at the password screen. Usually the cause of the failed connection is a mistyped password.)

5. I like to test things out when I join a new network. Try something that uses the Internet and make sure it works.  Here I fired up Yelp, which requires the Internet, and I can see it's working okay.


Back home now. The cool thing: as the message on the screen says, when you return to a network you've used before, your iPad (or iPhone  / iPod Touch) remembers and will connect you automatically. You walk in the door, and the iPad knows it's home and connects you!  Here we can see Book Corner home network is back online without me having to do anything.

So if you have hesitated taking your iOS device on the road, feel free now to bring it with you.  Just follow these steps to connect to the Internet wherever you have WiFi connectivity!


Sunday, March 10, 2013

Setting Up Multiple E-Mail Accounts on your iPad

Many people over the years have accumulated more than one email account. Wouldn't it be nice to  get all your email on your iPad?  Or perhaps you have one iPad shared by two or more people, and each of you needs to get their email using the iPad (a common vacation convenience).


 Here are step-by-step instructions for adding additional email accounts to your iPad or other iOS device.  It's easy to both add and remove extra email accounts!

 Adding an Email Account to your iPad, iPhone or iPod Touch Email


 1. Tap your home button and locate your Settings icon.  Tap it to view Settings.


 2. Tap Mail, Contacts, Calendars.  Note on the right under Accounts your current Email account is listed.
3. Tap "Add Account..." as in the red square above


 4. Select the email service of the account you want to add.  I need to add a Yahoo email.

 5. Here I enter my Yahoo email ID, password and the name on the account (usually your name)

 6. I left these defaults and tapped Save in the upper right.

 7. Switch back to your email inbox.  Tap "Mailboxes" in the upper left.

 8. Now I have a Yahoo email account listed in addition to my Gmail.
I can either:
  •  Choose All Inboxes to see mail from all email accounts together in the Inbox
  • Choose either Gmail or Yahoo email to only see one email account in the Inbox at a time.  You would choose this option e.g. if you are a couple sharing an iPad and only want to see your email.

 9. I choose Yahoo email in #8 above.  When I go to the Inbox, it shows just email from that Yahoo account.

Removing an Email Account

 Removing an extra account is easy.
1. Tap the Home button and then Settings

 2.  Tap Mail, Contacts, Calendars. Note on the right under Accounts all of your current Email accounts are listed.
3. Select the email account to be removed.

4. Click Delete Account


One final tip: in the Mail app, you can receive email in one account and send from another account.  Simply tap and briefly hold on the From: address.  Up will pop a list of your connected email accounts.  Then choose which email account your reply will come from.  For details, see choosing which email account you reply from.